
Update: Added images for Main Concepts sections (Food, Defense, etc)
Update: Added steps for How To Assign a Settler to a Work Station/Shop/etc
Update: Added how to Give Yourself Any Building Components, or Food, with Commands (Cheats Section)
Update: Added how to Build past the Size Limit in Settlements (Not a Cheat, Doable on Console as well as PC)

 [Note.: This post is 'LIVE' and 'UNDER CONSTRUCTION', as I continue to add more data and Tips and Example Screenshots to it... I decided to make it available now however, to assist those playing Fallout 4; especially those just starting out - seeing as there is a Steam Sale on now (go get it! heh). I will be adding more Text and Tips and Screenshots and More and this post cannot be considered 'finalized' until after I add a 'Final Footer Image' to the posting (see some of my other posts for examples of this type of 'end image' I put in my posts). Please excuse changes as they occur and temporary mistakes and spelling errors, which may show up should you return to this article while it is under development. Enjoy, however - I hope you find something helpful to you - and have fun in Fallout 4!]
I have been having a ton of fun playing Fallout 4 lately... and while I am taking forever to finish up a 'First Impressions' of the game [I keep playing and building up my Settlements instead of writing!], I wanted to share some Tips on handling Settlements; some concepts and ideas that might help new users to the game, players that may not have developed their Settlements very much yet, or players that are looking for ways to possibly improve or increase their Settlements and their Production and associated benefits (Bottlecaps income from Stores, Settlers roaming around and finding/providing you with Supplies, Clinics for healing and removing Radiation, and more).
 |
| Screenshot showing the Workshop Area of The Sunshine Tidings Cooperative, Decorated (Work In Progress - I was only beginning to Build!). (High Resolution Texture Pack enabled [not 100% sure, sorry, but I think it was at this time] The Automatron DLC Robot Workbench can be seen, center background. Minuteman Flag seen, left wall, foreground) Click to see Full Size |
[Settlements and their development and growth is one of my favourite aspects of the game, not only because it supplies you with Junk/Scrap/Materials to build with and Money as well, but also because of the 'life it breathes into the game'... every Settlement becomes 'alive' with people coming and going, working and resting, asking for help or talking amongst themselves around you. After getting a few Settlements set up and running smoothly, they become a place to restock, sell and collect, modify and improve gear, rest and maybe enjoy some scenery, taking a break from the action by building and re-working, improving and creating a place of solitude and pride, in each little 'town' in The Commonwealth...]
| Example of the Workshop Mode interface bar, normally seen at the top of the screen in Workshop Mode (Building mode) Click to see Full Size |
Here then, are some main ideas to start off with or to keep in mind - hopefully helpful to fellow gamers who are either starting out in Fallout 4 [from the latest Steam Sale], or are looking for ways to improve their currently-undeveloped Settlements (colour-coded somewhat-by-importance to help separate them for easier reference):
1. In the very beginning, build Food and Water and Beds, as much as you can.
These three things (Beds, Water, Food) are the main limiting factors to how many people will come to live in a Settlement.

[The maximum amount of people that can 'live in your town' is supposed to be your Charisma+10 (so if you have 5 Charisma, that would be 15 people); Provisioners who run Supply Lines (more on them later on down further) don't seem to count towards this calcuated total (by my experience so far). Also, this limitation is stated in many places online - however, I have Settlements that are much higher than this number (over 30!) so I have not finalized the concept of Settlement Limitation Amount, at this time]
Don't worry about Guard Posts and Turrets, at least, as much as you might think at the start - because although they do help with the overall safety of your Settlement; reducing the amount of Raids that occur, reducing the amount of Damage that will be sustained in the Raids, and setting a higher Security rating (which seems to affect Happiness, but not Immigration rate - more on Happiness later on...) - you can actually put the responsibility on yourself to take care of Raids at first [and get the bonus experience and loot that comes with it!] by Fast Travelling to the Settlements as soon as you see the 'Help Defend' tasks come up - or making 'rounds' between your Settlements as they are starting up, as Raiders sometimes attack while you are there and you can then help clear them out - and get all the Loot they drop, too!
[The game leads you towards building Turrets at your Settlements near the beginning, too - in the form of a 'tutorial' of sorts, somewhat-early on]
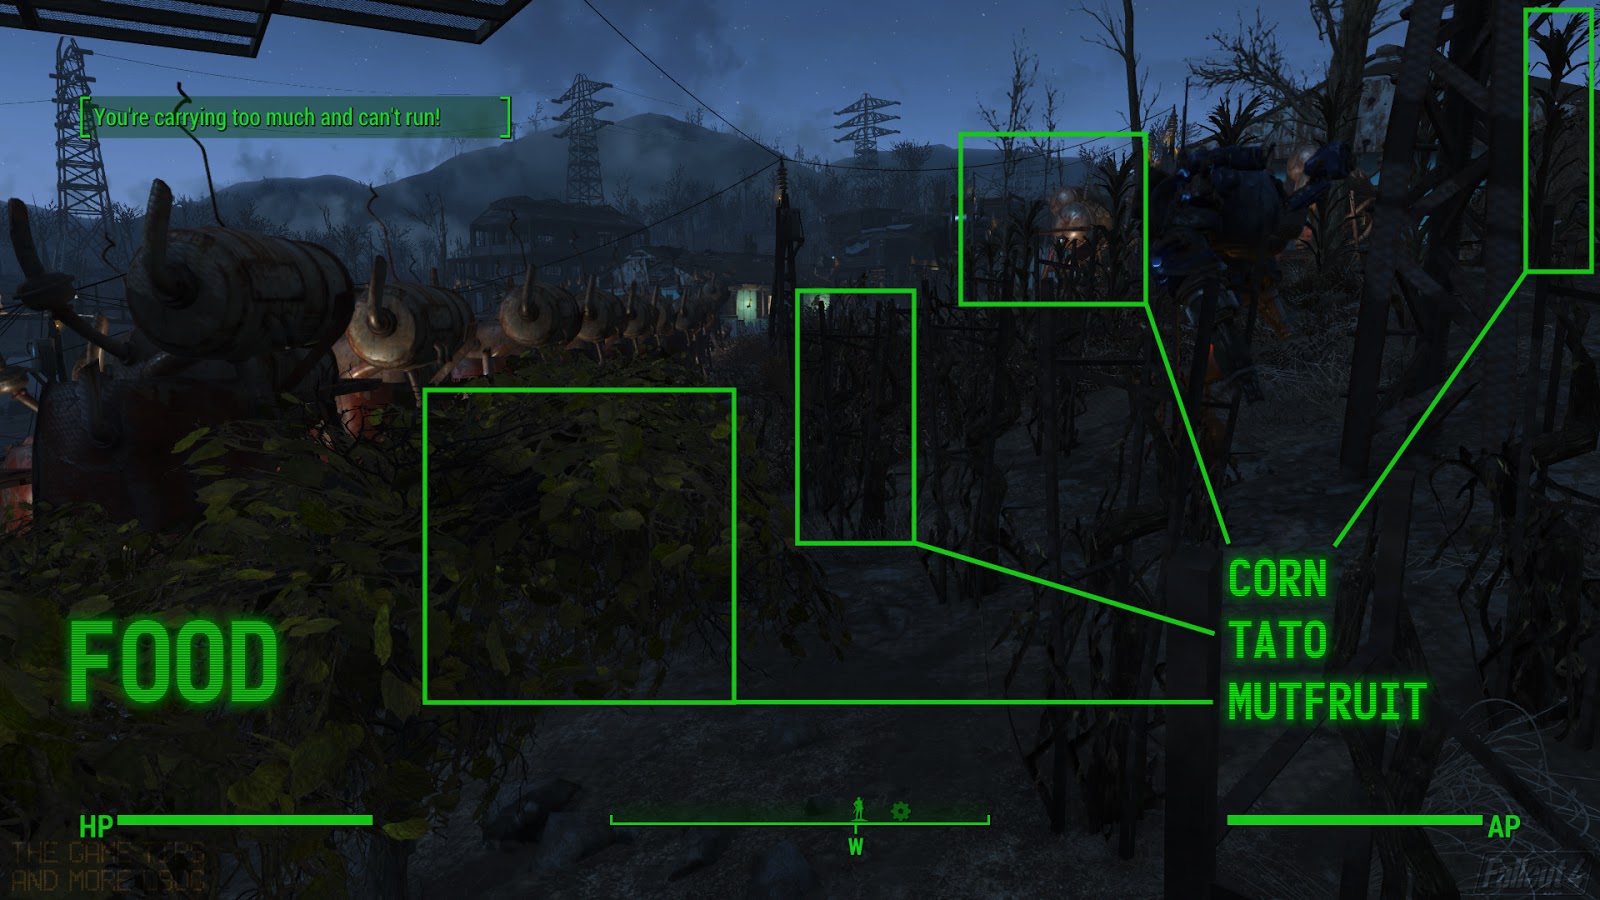
2. Plant any Food (Corn, Tatos, Mutfruit, Gourds, Watermelon and Razorgrain) you find, at first.
Starting out, you want to maximize your growth, so re-planting food you pick up not only increases how much food a Settlement can produce/feed for the Settlers, it also multiplies how much you can harvest!
You can harvest any plants by 'picking them' (hitting the Action key while close to them). You can then immediately re-plant the food you just picked, by entering Workshop Mode and going to the Resources>Food section.
A while later, you can start to Cook with your Food - not only do the meals you prepare have special bonuses (they are all different!) but boiling up some VEGETABLE STARCH, made from all materials that you can gather at any Settlement, is a great way to create your own Adhesive building material. Used for almost everything, Adhesive is a very important material to have!

Vegetable Starch, a source of Adhesive, you can create yourself by cooking together Corn (3), Mutfruit (3), Tatos (3) and using Purified Water (1). Purified Water, you can either find as you travel, cook yourself [3 Dirty Water can be boiled up to make 1 Purified Water], or use Water leftover from your Water Sources in your Settlement - as any extra Water that is not used by your Settlers will be 'kept by the Settlers in the Workshop inventory' [in the Workshop Bench]. You need Adhesive for Modifications to Weapons and Armor and even for Building - it is used for almost everything and is therefore very important to keep stocked!
3. Tied for the third most important thing/things to start thinking about, are these two concepts:
- As you can, increase your Turrets and Guard Posts, to increase the Security of the Settlements, and as stated above, reducing the amount of Raids that occur, reducing the amount of Damage that will be sustained in Raids, and keeping your Settlers 'feeling secure and more relaxed' (Happier), too.

Although the Security Rating of a Settlement ("Defense") does not effect the speed at which Settlers will immigrate to your little town, the Defense Rating of a Settlement affects the Happiness Rating - which affects how 'Productive' the Settlers are in that Settlement (speed of gathering resources, amount of Caps earned, etc) - more on Happiness later on...
If you have more Guard Posts than you have assigned Guards, they will 'patrol' around the Settlement, going between them, back and forth. If you have the same amount of Guard Posts to Guards, they will each stay at one, standing 'on guard', most of the time.
[I personally like to have a couple extra Guard Posts created in my Settlements just to have the Guards move around more... It creates more movement in the Settlements overall and makes them 'feel more alive' - something I really like in my Settlements!]
- Build extra Scavenging Stations as your Settlement grows, as your Junk/Materials allow you to, so as the Settlers keep flowing in, you can assign them to the empty Stations - concentrating more on Scavenging over time will get your Settlers working and searching around, bringing you any Junk Items they find, "automatically" for you to then use!

Scavenging Stations are assigned to Settlers, who then start wandering the Settlement randomly, picking up Scrap and Junk items they find and placing them in the Workshop over time - they will even 'break down' the items at the Scavenging Station - and you can watch them do it!
[If you have the Automatron DLC/Expansion, you will find that robots Assigned to Scavenging Stations will simply stand next to the Station with no animations occurring (sadly)]
'How do you Assign Settlers to Scavenging Stations?'
Further down, there are Steps with Screenshots for each,
in the Section "How To Assign Settlers To Work Stations"
Further down, there are Steps with Screenshots for each,
in the Section "How To Assign Settlers To Work Stations"
After a while, with more Settlers coming in (sometimes they will migrate to your Settlements quite fast, seeing a solid place to find food, water, beds and have some security/safety), you'll start to see Junk/Scrap/Materials pile up slowly, even Bottlecaps flowing in, sitting there waiting for you in the Workshops of your Settlements.
[If you have extra Food/Plants/farming and Guarding that needs to be done, Settlers seem to assign themselves to those first, if you haven't been by to visit in a while to 'tell people what to do' - I have returned to Settlements to find New Immigrants that have started Farming or standing at Guard Posts on their own - but I have yet to see Settlers that Assign themselves to Scavenging Stations]
Don't forget to 'make your rounds' and periodically travel around to check all of the Workshops, grabbing these extra 'Caps and 'Mats, snatching-up the extra Purified Water you'll see in them, to sell for even more Bottlecaps (especially if you are more desperate for money sometime). Purified Water is created by extra Water production of the Settlement; water that the Settlers aren't using from the Sources you have set up. This extra Water gets placed in the Workshop for general use and Supply Line provisioning to other Settlements - but since it sells for a decent price and 'piles up for free', grab it and Sell it, if you really need 'Caps!
4. As you find more Settlements, start up Supply Lines between them all...
Supply Lines are ways to 'share' the resources of the Workshops between Settlements. You assign a Settler to create a Supply Line between two Settlements, and they then become a "Provisioner", leading a Caravan between the two Settlements, taking supplies between them so that you can effectively 'use the Junk/Scrap/Materials/Components of both of them', no matter which one you are in!

Supply Lines are started by entering Workshop Mode, then going up to a Settler (one that is Unassigned with no 'job to do', or one that you want to make run a Supply Line instead of the job they are currently assigned to) and choosing Supply Line from the bottom menu bar.
That townsperson will then become a Provisioner, leading a caravan and a wacky Brahmin through the wilds of The Commonwealth... between the Settlement that they originated in and the one that you assigned them to make a Supply Line to.
Between these two Settlements then, you can utilize any* Junk/Scrap/Components between them, in their Workshops.
*Note that it appears you cannot share any Weapons or Apparel that you put in [I have not tested Miscellaneous items yet]; you can only share Junk [as of the time of this posting, this may change in a future Update/Patch in the game, of course].
Requirement: Supply Lines require the Local Leader Perk to be able to 'organize the people', which requires a Charisma of 6 - but it has no Level requirement, so you can get it at the start of the game if your Character has a Charisma of 6.
If your Character does not have a Charisma of 6, you can also put Perk Points into Charisma as you Level - you get one Perk Point every time you gain a Level - thereby slowly increasing your Charisma to 6, eventually. You can also put on Gear and Clothes that 'accentuate your Charisma rating' [eg. Apparel that says "CHR 1"], to get your Charisma up to 6 'instantly'!
While this won't Unlock the ability to choose Charisma Perks (the 'Skills' or 'Talents' in Fallout 4), it will still affect other people/NPCs in the game, for example, it will help with getting better Prices/Sales at Vendors and Merchants throughout The Commonwealth.
[With places like Tenpines Bluff, a Settlement you find somewhat-early on, that has barely any resources at all and barely anything to Scrap for Building Materials - the game seems to even be encouraging you to think about Supply Lines (eg. creating one from Sanctuary Hills to Tenpines Bluff)... at least, this is my interpretation..]
Pick Up Everything! Loot Every Body And Clear Out Every Location You Find!

Workshops will create Scrap building materials (Components) for you 'automatically' from any Junk Items you store in them - just 'keep building' and if you have the Junk that can be broken down into the Components you need, it will do it for you!
What I mean by the above Tip is, if you put in a bunch of Forks and Knives you have found (for example), and you want to build something in your Settlement that requires Steel to build with, just go ahead and start Building - your Workshop will 'smelt/breakdown the Junk items (in this example, the Forks and Knives) into Steel' automatically, so you are essentially 'using the junk to build with' - you do not need to "drop the items on the ground and then go into Workshop Mode and Scrap the items one by one" to get the Materials from your Junk items to Build; just select your part to Build and it will let you build it - if there is enough "components from junk parts" to do so!
[I'm not sure if this changed from an early Patch or something, but I see a bunch of people asking in forums, even recently, if there is an easier way to get Scrap (building materials) from Junk items besides manually 'Scrapping them one-by-one on the ground in Workshop Mode' - there should have been a better Tutorial for this, in a way, in the game itself; but I hope this information above clears it up and helps people out]
Remember:
Junk Items = Scrap Components =
Building Materials!
Junk Items = Scrap Components =
Building Materials!
Pick Up Everything! Loot Every Body And Clear Out Every Location You Find!
- Repeated, Scavenging Station concept from above, as a Reminder:
Build extra Scavenging Stations as your Settlement grows, as your Junk/Materials allow you to, so as the Settlers keep flowing in, you can assign them to the empty Stations - concentrating more on Scavenging over time will get your Settlers working and searching around, bringing you any Junk Items they find, 'automatically' for you!
Scavenging Stations are assigned to Settlers, who then start wandering the Settlement randomly, picking up Scrap and Junk items they find and placing them in the Workshop over time.
[If you have extra Food/Plants/farming and Guarding that needs to be done, Settlers seem to assign themselves to those first, if you haven't been by to visit in a while to 'tell people what to do' - I have returned to Settlements to find New Immigrants that have started Farming or standing at Guard Posts on their own - but I have yet to see Settlers that Assign themselves to Scavenging Stations]
[If you have the Automatron DLC/Expansion, you will find that robots assigned to Scavenging Stations will simply stand next to the Station with no animations occurring (sadly)]

How To Assign Settlers To Work Stations (To Get Them To Perform Jobs In Your Settlement, Such As Running Shops/Stores Or Gathering Items For You To Use)
Below, are the five simple steps to Assigning a Settler to any Work Station, getting them to utilize it and start contributing to the income of Supplies/Income of the Settlement. In this example, we are going to Assign a Settler to a Scavenging Station:
1. When you first build/place a Station or Store/Shop or other useable buildings in your Settlement, it will show up as "Unassigned", in the Workshop Mode interface. All buildings that are Assignable in a Settlement will show a 'person icon', in Red, to show that the building has a Requirement that needs to be fulfilled, for it to begin functioning.

2. Find a Settler that you want to Assign to the Station. This can be a Settler that is already "Assigned" to something (so you can change their Job they are Performing in your Settlement), or a Settler who is "Unassigned" (doing nothing specific). Highlight the Settler by looking directly at them, then press the ACTION button to begin to 'COMMAND them to do something'...

Settlers who are Unassigned still gather Junk Items they find while walking around and put them in the Workshop Inventory for use by everyone. However, this happens slower than if they were Assigned to a Scavenging Station (which gives them 'access to tools'). "Unassigned Settlers" contribute to 'making people feel uneasy' in the Settlement - which negatively affects the overall Happiness of that Settlement (resulting in lowered Production for that Settlement). Assign all Settlers to Tasks, or Relocate them to another Settlement ("Move" them), if there are no Jobs/Tasks for them to do.
3. Go back to the Station/Shop/Building that you want to Assign the Settler to, and highlight it by looking directly at it. Then click the ACTION button to ASSIGN the Settler you just started COMMANDing, to 'utilize this Station' (in this example, the Scavenging Station, shown below).

4. After clicking ASSIGN on a Station/Shop/Building, the 'person icon' should change from Red to Green, to show that a person is now assigned to the Station/Shop/Building (for example, the 'Requirement for the Station to function' is fulfilled). You should also see a message in the upper-left saying, "This resource is now assigned." - that's it! In this example, you have now Assigned a Settler to the Scavenging Station.

5. If you go back to the Settler, you can check to make sure they are properly Assigned, by looking at them directly in Workshop Mode. They should now show the Task they are Assigned to (in this example, the Settler now shows a "Scavenging Station Icon" (a Buzzard, 'the scavenger bird')).

Perform the above steps whenever you want to Assign a Settler to any Work Station, Guard Post, Shop or Store - the steps are the same, no matter what you need to have Assigned.

Pick Up Everything! Loot Every Body And Clear Out Every Location You Find!
 |
| Example of a Crafting Station, which allows you to create or modify items in the game. This is a Weapons Workbench (from Sanctuary), used to Modify found Weapons, adding higher capacity, faster firing rates, more powerful scopes, and more. (Click to see Full Size) |
Starting out with Weapons (Similar Concept to Armor, Below)
In the beginning, other than the best Weapons you can save for yourself to use (or share with your Companion), SCRAP the rest for Materials...
Don't worry about building up a 'Collection to Sell' [at the start], you will run into so many enemies that you will have lots of spare Weapons to Sell for Caps later on. Scrapping for Materials not only lets you have Mats to Modify other Weapons you find and improve them as you Unlock Perks with your Points (using the Blacksmith skill) - it will also let you find other parts/materials as you 'break down' the Weapons you find into typical weapon-type-materials like Steel, Wood, Plastic and Screws - sadly, you cannot break down Weapons to gain the ever-important Adhesive, it seems [it is 'already used', I guess!].
 |
| Example of a Crafting Station, that allows you to create or modify items in the game. This is an Armor Workbench (from Sanctuary, seen in the rain), used to Modify found Armor, adding bonuses like more defense (adding more material to armor), or putting pockets in it (to allow you carry more weight), and more. (Click to see Full Size) |
Starting out with Armor (Similar Concept to Weapons, Above)
In the beginning, other than the best Armor you can save for yourself to use, (or share with your Companion), SCRAP the rest for Materials...
Don't worry about building up a 'Collection to Sell' [at the start], you will run into so many enemies that you will have lots of spare Armor to Sell for Caps later on. Scrapping for Materials not only lets you have Mats to Modify other Armor you find and improve them as you Unlock Perks with your Points (using the Armorer skill) - it will also let you find other parts/materials, as you 'break down' the Armor you find into typical armor-type-materials like Rubber, Cloth, Leather and Steel - sadly, you cannot break down Weapons to gain the ever-important Adhesive, it seems [it is 'already used', I guess!].
Short Story/Example About Armor: Because I could Modify and Customize Raider Arm armor near the beginning, I gave up the higher-protection "DC Guard Left/Right Arm" armor pieces that I picked off of a poor dead DC Guard, [because it does not seem to Modify-able in the game and] because I 'knew how to Modify' the Raider Armor to be POCKETED for higher Inventory/Carry space [you need to 'learn how', by putting Perk Points ('skill points earned every Level') into Armorer, a Strength 3 skill]. I put the DC Guard Armor in a Dresser at the beginning for the time being, using the 'Pocketed Raider Arms' I could Modify, then - a higher Carry Weight Limit is a valuable commodity - especially at the beginning!
Pick Up Everything! Loot Every Body And Clear Out Every Location You Find!

Did someone say CHEATS?
Then wonder/wander no more - there is a way to instantly get all the materials you want!
In Fallout 4 [and most Bethesda games], you can type the item you want and how many you want, of any item in the game, into the Command Console. However, you need to know the item's Unique Identification Number, first (known as the "Base ID" of the item, in Bethesda games).
One way to find the Base ID of any item or object in Fallout 4, is to open the Console (by hitting the Tilde key, "~", usually found next to the Number 1, in the line of numbers across the top of QWERTY keyboards), and clicking on the item or object in the game. It will then show the BaseID of the object at the top/center of the Command Console area.
For an example; if you wanted to find out the Base ID of that Deathclaw running at you (and since we are in the 'Cheat Section' of this article, say... you want to kill it instantly), then you would find out the ID for it by opening the Console ("~") and clicking once on the Deathclaw (it should be 'frozen' by opening the Console), which would show the BaseID of it just below, at the top of the Console area. Now, for this example of 'killing it instantly'; you just have to type in "kill", then a space, then type in the BaseID you see on the screen, and hit Enter. BOOM. That Deathclaw that was running at you (and you were unprepared for, full of inventory and unable to run, no doubt)? It's dead. "First Crack At The Gear!"
[Note1: If you try 'clicking on the enemy, then typing KILL, then just hitting ENTER' right away; it may not work as desired. You may end up killing yourself... Although those steps do work, they do not seem to work 100% of the time [in my testing], therefore, the Suggestion of doing the steps from just a bit above ("clicking to get the ID, but typing in KILL and the ID number"), is recommended - to save from accidentally killing yourself and having to LOAD...]
[Note2: The BaseID seems to change [in my testing], as in, when a Deathclaw (from our example above) 'spawns' (comes out of the ground), it will have one ID (and it seems to be 'unkillable' for a short time), and then when it starts to come at you and attack, it will change to another ID - which can then be used in the Command Console to 'kill' it. Also, Base Identifiers may be 'Procedurally Generated', which is, automatically and repeatedly created and changed, as a game goes on. Although this does not seem to happen for items like Food and Materials, it does seem to happen with Enemies and Gear (Weapons/Armor) - so be sure to take the steps above when trying to manipulate objects around you (eg. 'kill'-ing an enemy), finding the BaseID each time, to be sure that there will not be a mistake or missed opportunity, to utilize the BaseID in the Console.]
Want nearly-infinite food?
Want nearly-infinite materials to build with?
Want to 'just build and not worry about going around collecting Junk (to build with)'?
Then wonder/wander no more - here is a way to instantly get all the building materials you want!
[WARNING/Suggestion: Although getting all of the items you could ever want, whenever you want, to 'Just Build' - effectively turning the game into "Fallout 4: The Sims Apocalypse" where you just Build and Decorate and work on keeping your Settlers at bases Happy (not that that's a bad thing) - it can potentially contribute to making the game 'less exciting', as it takes away much of the need to go anywhere or do anything (other than keep your Settlers' Happiness maintained). This isn't a bad thing necessarily (I have one Character I created just to play around and learn the Build Mechanics with and have fun just building and decorating..). I only mention this because I would like to Suggest to create a separate Character to do this with, or remember that when the game 'gets kind of boring', to create a Character where you 'don't cheat at all', to create suspense/tension within the game. No matter how you prefer to play though, I hope you enjoy Fallout 4 as much as I have - and still do... Have fun!]
I have some Batch Files for Fallout 4 below, which will allow you to 'type in to the Console what you want' [Materials to build with, or Food (so you won't have to worry about Farming or feeding your Settlers)] and you will instantly have a ton of those items on your character.
With the Items in them listed in Alphabetical Order, I have one file that is for getting Materials (Scrap/Junk to Build with), one file that is for getting Food (to Eat/Cook with) and one that is for getting huge amounts of both in one shot...
To use these Batch Files in Fallout 4, simply download the Text file(s) and place them into the Fallout 4 game directory/folder, where the game data/files are.
[Don't worry, they are just Text Files, but I give directions on how to make your own further down, if you 'don't like to download things unknown very much'.]
To quickly find the Fallout 4 game files location [in Steam, on PC]:
Go to the Library section in Steam and Right-Click on the "Fallout 4" listing, choosing 'Properties'.

In the Properties window that comes up, click on the 'Local Files' tab.

It shows you what Drive the game is on; but to quickly get to the game files themselves, click on the 'Browse Local Files' button, which will open a new File Explorer window (Windows).

This location is where you want to Save the Text Files to (the 'Batch Files for Fallout 4'), usually it will have a Path like "SteamLibrary\steamapps\common\Fallout 4" on whatever Drive/Partition you installed the game to.
In that folder, Download/Save (or 'Paste', if you 'Copied' the files from another location) the .TXT files, to be able to call them up from the Command Console in-game.
 |
| Example of how the 'Batch Files' (Text Files) look, after being placed in the Fallout 4 Game Folder (Click to see Full Size) |
Here are the steps to use the .TXT-format 'Batch Files' once they are in the game directory (shown for the file for getting Food, the file for getting Building Materials, and then the file for getting Huge Amounts Of Everything To 'Just Build' if you want...):

For the last one, which gives 9001 of every single type of Food AND Crafting Component in the game [maybe I should have named it "IJUSTWANTTOBUILD.txt"], use the steps below:
Here is where to Download the Text Files to place into the Fallout 4 directory/folder (the 'Batch Files' to use), from the GoogleDrive for The Blog:
allbasefood.txt file
allbasematerials.txt file
allyourbase9k.txt file
If you don't like to normally Download things 'from unknown places/people' [aren't we just 'Friends That Haven't Met Yet, though, my dear reader?], here is what the Google Drive link looks like when you click on it:

Still, feel free to Scan the files with your installed Anti-Virus Program(s), or online through something like Virustotal.com (this is actually a good idea to do with anything Downloaded..).
If you you rather create your own Text Files, to place into your Fallout 4 directory/folder, to run as 'Batch Files', to give yourself an amount of these items, instead of fully Downloading the Text Files offered above - then here are the steps to create your own files:

Sadly, there is a limit to how much you can Build in a Settlement - indicated by the SIZE bar in the Upper-Right corner of the screen in Workshop Mode. While this limitation is there to stop us from building so much that it makes the game go down to 1fps in that area, the SIZE limit is pretty conservative [in my opinion] and I found out that there is an easy way to 'Build More' - getting past that Build Size Limitation....
When you see the message, "Nothing More Can Be Built.", you can just press your lips together and blow, making that weird trumpet sound, after reading the steps below. No Limitations for you! Just follow these steps and you can continue to Build in that Settlement:
(Note that this is not a Cheat, it does not affect Achievements and it is doable on Console as well as PC)
That's it! You can now build more in that Settlement. Enjoy! If you want to retrieve your Weapons, you can just go into the Workshop Inventory ("Transfer") and get them back - which means you can repeat these steps over and over, as needed! (Don't forget to Share your Screenshots on Steam or elsewhere - other people want to see what you can do - and it gives them new ideas, too)
Although it is possible to get past the Build Limit by simply dropping 'any item' and Scrapping it, this is still not what I was trying to do, with the Steps above. My intention was to STORE the Guns, so that they can still be utilized later - selling them for Bottlecaps, or 'Breaking Them Down' and taking their Modifications off to use on other Weapons, or just using them as Weapons in the game on the Character (or given to Settlers to help them fight off Raids/Attackers) - that is why the Steps above utilize my STORE method. Storing the Guns allows you to continue to use them (as opposed to Scrapping them into Components to Build/Craft with).

[......I am going to add to this post, as I remember things that I already have forgotten and can't seem to bring back up at the moment to throw in here; but I still hope someone finds these concepts and Tips helpful, for either starting out in the game or improving your Settlements (there are more advanced concepts to come..... Have fun with Fallout 4!]
1A. To use the file that gives you 1000 of all types of Food (so you don't have to worry about Farming or Feeding your Settlers for a long time); type in
bat allbasefood
in the Command Console and hit Enter. That's it!
1B. You can now close the Console and you'll find you have 1000 of every type of Food in the game, on your person.
1C. Go to a Workshop to Store the Food there (otherwise you will be 'overburdened' with all of that Food in your pockets) - you will find the Food items under the AID section in your Pip-Boy, as shown below:
2A. To use the file that gives you 1000 of all types of Materials to build with (all of the Crafting Components, so you don't have to worry about going out and looking for and collecting Junk items to Scrap for a long time and can 'Just Build', if you want to play that way for a while); type in
bat allbasematerials
in the Command Console and hit Enter. That's it!
2B. You can now close the Console and you'll find you have 1000 of every type of Building and Crafting Material in the game, on your person.
2C. Go to a Workshop to Store the Materials in the Workshop Inventory (otherwise you will be 'overburdened' with all of those Crafting Components in your pockets) - you can just hit the STORE ALL JUNK button, to do it in one step.
For the last one, which gives 9001 of every single type of Food AND Crafting Component in the game [maybe I should have named it "IJUSTWANTTOBUILD.txt"], use the steps below:
3A. To use the file that gives you 9001 Of All Types Of Everything To 'Just Build' With (all of the Crafting Components in the game, so you don't have to worry about going out and looking for and collecting Food OR Junk items to Scrap, for a long time and can 'Just Build'); type in
bat allyourbase9k
in the Command Console and hit Enter. That's it!
3B. You can now close the Console and you'll find you have 9001 of every type of Building and Crafting Material in the game, on your person.
3C. Go to a Workshop to Store the Junk Items (Materials) and the Food (from the AID section in the Pip-Boy), in the Workshop Inventory (otherwise you will be 'overburdened' with all of those Every Frelling Thing In The Game For Settlement Building in your pockets).
Here is where to Download the Text Files to place into the Fallout 4 directory/folder (the 'Batch Files' to use), from the GoogleDrive for The Blog:
allbasefood.txt file
allbasematerials.txt file
allyourbase9k.txt file
If you don't like to normally Download things 'from unknown places/people' [aren't we just 'Friends That Haven't Met Yet, though, my dear reader?], here is what the Google Drive link looks like when you click on it:

If you you rather create your own Text Files, to place into your Fallout 4 directory/folder, to run as 'Batch Files', to give yourself an amount of these items, instead of fully Downloading the Text Files offered above - then here are the steps to create your own files:
Is There A Way To Build More, Past The Limit?
Sadly, there is a limit to how much you can Build in a Settlement - indicated by the SIZE bar in the Upper-Right corner of the screen in Workshop Mode. While this limitation is there to stop us from building so much that it makes the game go down to 1fps in that area, the SIZE limit is pretty conservative [in my opinion] and I found out that there is an easy way to 'Build More' - getting past that Build Size Limitation....
When you see the message, "Nothing More Can Be Built.", you can just press your lips together and blow, making that weird trumpet sound, after reading the steps below. No Limitations for you! Just follow these steps and you can continue to Build in that Settlement:
(Note that this is not a Cheat, it does not affect Achievements and it is doable on Console as well as PC)
- Get some Weapons together on your Character (specifically Guns, as this specific technique does not appear to work with Melee or Thrown in my testing). Apparel and Junk does not work for this either.
- Bring up the Pip-Boy and Drop the Guns on the ground
- Close the Pip-Boy and enter Workshop Mode (by Activating the Workshop Bench or holding 'V' (on PC) to open Workshop Mode)
- Look down at the Guns on the ground and STORE them in the Workshop Inventory (careful not to SCRAP them, that is not what we are doing here at the moment!)
- You should now see your SIZE bar going in reverse and it will even change from Red to Yellow to Green. BOOM. More Room To Bloom.
That's it! You can now build more in that Settlement. Enjoy! If you want to retrieve your Weapons, you can just go into the Workshop Inventory ("Transfer") and get them back - which means you can repeat these steps over and over, as needed! (Don't forget to Share your Screenshots on Steam or elsewhere - other people want to see what you can do - and it gives them new ideas, too)
[......I am going to add to this post, as I remember things that I already have forgotten and can't seem to bring back up at the moment to throw in here; but I still hope someone finds these concepts and Tips helpful, for either starting out in the game or improving your Settlements (there are more advanced concepts to come..... Have fun with Fallout 4!]
No comments:
Post a Comment